DIY Photo Daily Routine Board

Monday, November 28, 2022

No comments


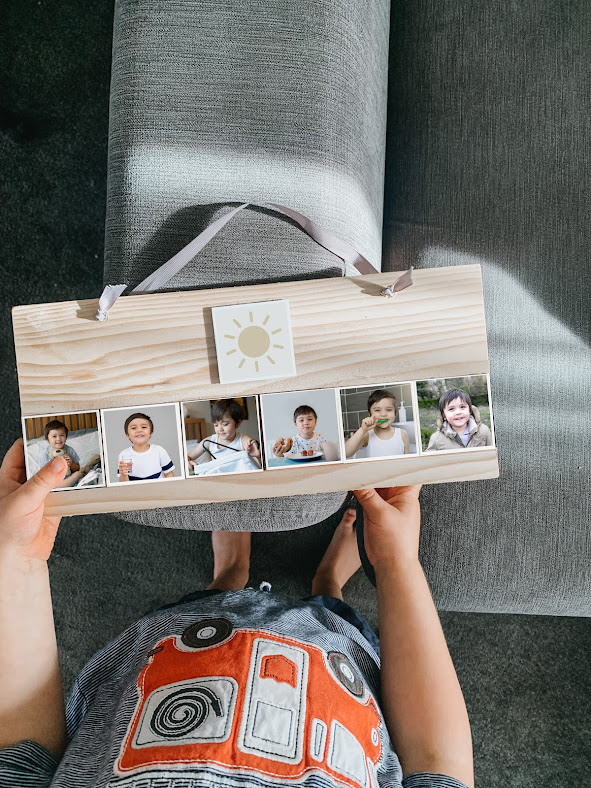
Today I am sharing the photo routine board that I created for my son's morning and evening routines. I first made it when he was a toddler, to help him with transitions. I also wanted something that would go nicely with our decor in our living room! So I created a wooden board with magnet photos of him doing each task and it hangs from a ribbon, on a command hook, at his level. 

I change the morning or night one depending on what time of day it is and we often carry it upstairs with us during the routines. I love that the board lets my son know what is next on his routine board, without me having to regularly say it to him. I just encourage him to look on his board to see what is next.

I took photos of him (on a day with no plans!) doing each task in his morning and evening routine. He found this very funny and we had a laugh together!

I then got the photos printed as 5cm magnets from Photobox. I bought a pack of 2 wooden boards (I am sure you could get similar here) and an A4 adhesive magnet sheet. I cut the magnet sheet up to make a strip across each board and another for the top square magnet (to show a sun or moon to represent morning or evening). We then drilled holes in the top and added a ribbon so it's easy to display.

I love that these are magnet photos so we can change the order around if needed and get newer ones printed to update it if anything changes. As always with my DIY project, once our family has finished using this board I plan to donate it and hope it can be used by more families. 

You could make this at home and get the photos printed as magnets from the link above. I have also included a Canva template if you preferred to use that, for you to drag and drop your photos into it (along with a sun and moon design) in case you wanted to print your own at home onto card. 


Canva template - US Letter (8.5 x 11 inches)

Canva template - A4 size (21 x 29.7 cm)


P.s. I have used stock photos in these images that I am sharing.


Read More

Project - Fillable Christmas Crackers

Friday, November 25, 2022

No comments


A couple of years ago I decided to get a pack of DIY fillable Christmas crackers and find some fun things to put in them, that is nicer quality than the usual contents they come with.

I chose a beautiful, realistic woodland animal figure set and placed a different animal inside each cracker. I also added a mini Green & Blacks chocolate (for the adults!) along with the party hat and joke, that was in the kit. My son was delighted to look inside each cracker (he was around 2 at the time) and collect the animals. 

Since then I have enjoyed looking for a set of small items to put in the crackers each Christmas and last year I chose the 'People at work' figure set by Toob.


For this Christmas, I am planning to get these fillable crackers from Hobbycraft and am considering putting a different new lego person in each one. My son (age 4) currently really loves lego and I think he would enjoy these at the Christmas table. 

A few other ideas for things to place in the crackers:

- A set of small stamps
- A set of different (mini) cookies or baked goods
- A set of stickers (cut up into individual ones)
- Small arts + crafts materials
- Mini cars or trains
- A set of different dinosaur figures or another type of set (Toob do great ones!)


Read More

Free Printable - Kindness Advent

Monday, November 21, 2022

No comments


Today's free printable is for creating a DIY kindness advent calendar. This December I wanted to create an advent calendar that was minimal, thoughtful and something the whole family can do together each day. 

This will be a series of little 'daily kindness task' notecards that I will place into envelopes and stick number stickers onto the other side of each. The little envelopes will hang from a big branch on the mantelpiece in our living room. My son can then open one each day from December 1st - 24th. I have ordered these C7 kraft envelopes and these advent stickers from Etsy (delighted to be supporting small businesses!). 


I am sharing a printable PDF of 24 kindness notes (each note to fit in a C7 sized envelope) and also the numbers (in case you wanted to print them onto the envelopes or just have them on the back of little cards, without any envelopes)

DOWNLOAD - A7 sized notes on A4 size paper (21 x 29.7 cm)


Read More

Our Cleaning Box

Thursday, November 17, 2022

No comments


My son has a cleaning box stored in his Ikea kitchen shelf cupboard. It is an Ikea box with handles at the side that is easy to pick up and move. Currently it contains:

- Sponges (also with larger sponges I cut them in half to suit his size)

- Mini glass spray bottle (filled with water and a tiny bit of washing up liquid)

- Mini squeegee 

Children's nail brush 

- Dish brush head (used as a little scrubbing brush)

- Handmade cleaning mitt (made from a grey face cloth)

- We also always have a stack of cheeky wipes in the Ikea kitchen, ready for cleaning spills, faces and drying things. I find they are the perfect size for little hands.


My son cleaning his toys with the cleaning box, kept in his Ikea kitchen cupboard


My blog features affiliate links and as an Amazon Associate I earn from qualifying purchases. 


Read More

Tips to incorporate Montessori at home

Wednesday, November 16, 2022

No comments


Today I am sharing 10 things that have made a lot of difference in aiding my son’s independence in our home has included:

1. Having his bedroom as a complete ‘yes’ space and a mattress on the floor as his bed, so that he can choose to get up when he wants to and does not need us to help him. Everything else in his room has also been placed at his level, including an Ikea Expedit shelf which we turned into a wardrobe by adding a tension rod for the hangers (picture above).


2. I also created simple outline labels of different items of his clothing, which have been on his drawers since he was a baby, to help him identify what is where (You can find the free printable for those over here). Since he turned 4, we now have a wardrobe made of a shelving unit and baskets, each with the clothes outline labels on them.


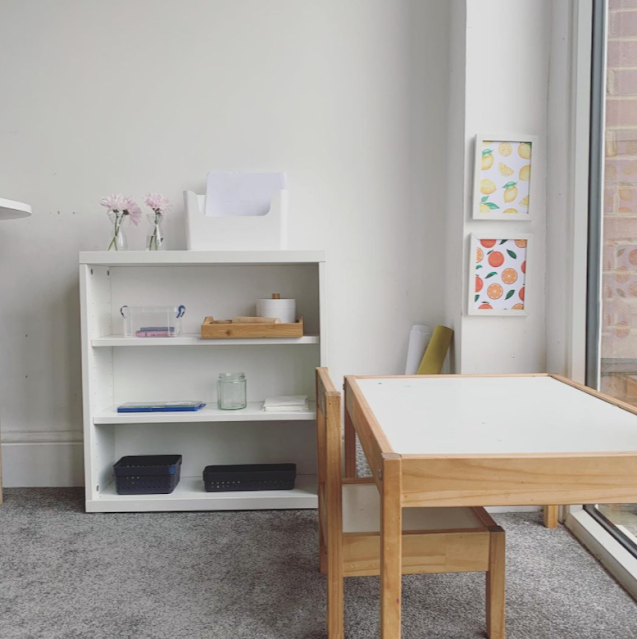
3. Cutting down a second hand Ikea LATT children’s table and chair set, to make a low weaning table for him. He used this until he was around 3 years old and now has a slightly taller table and chairs (for his size) in his section of the living room

4. Getting a Stokke Tripp Trapp high chair, that he can easily climb into and out of himself, for when joins the family at the dining table


5. A learning tower kindly given to us by a friend, so that he can join in food preparation (we have had this since he could confidently stand and he has loved things like helping to whisk eggs with my husband for breakfast since he was really little!

6. A set of coat hooks and the lower part of the shoe cabinet for his coats, accessories (in small hanging pouches) and shoes - all easy for him to access.


7. A self care station in the bathroom (made from a small second hand wooden table that we painted and added an acrylic mirror to) for him to brush his teeth at an appropriate level to him. We added a bowl as the sink, an Ikea water dispenser for the water source, and command hooks to hold a little flannel (his hand towel).


8. An Ikea kitchen which has been adapted to have a water dispenser (similar here), so that he can get his own drinks and wash his hands.

9. A small standing ladder so that he can climb into and out of the bath by himself (with close supervision).

10. Placing small laundry baskets (little bins) around the house (by the bath, in his bedroom, next to our washing machine) so that whenever he had anything for the wash, it was within easy reach for him to put it there himself

A few more suggestions for incorporating Montessori in your home


  1. To try and see as much as possible from your child’s point of view, both physically and mentally. You can literally get down to the child’s height to see what your home looks like and see if there is anything that could work better at this level - maybe add some small pieces of artwork to add more interest to their surroundings, or perhaps find a space lower down for some items of theirs that are used often, for them to reach themselves.


  1. Focusing on curiosity and exploration from their point of view as well; acknowledging their excitement and wonder at having reached something (perhaps that you didn’t expect them to reach) rather than quickly saying no and removing them from that place. Speaking of saying no, I would try and use this word as sparingly as possible, saved only for very serious situations. Otherwise children can get so used to the word being used so often around them, that it ceases to have much meaning for them (a great episode from Janet Lansbury's 'Unruffled' podcast, about this here)!


  1. Physically, it is always a good idea to have a ‘yes’ space in each area of the house - a place where it is safe for the child to explore happily. If this can be in the main living areas of the home and in the child’s bedroom, this is ideal for both child and parent as it means both are more comfortable in the spaces!


Your home will likely evolve and change as your child changes and enters new stages, and I have found that observation is key. To take a little bit of time to watch your child and how they use a space, what could be adapted a little bit, and where they are at right now with their capabilities, really helps to keep developing the space that is right for them at this time. 

For example, maybe you can see that you have been wiping floor spills for them since they were very little, but now they may be ready to have a small designated floor cloth folded up and placed into a low cupboard, for them to reach themselves when they spill something.

Read More

Free Printable - Toy Rotation Labels Template

Monday, November 14, 2022

No comments


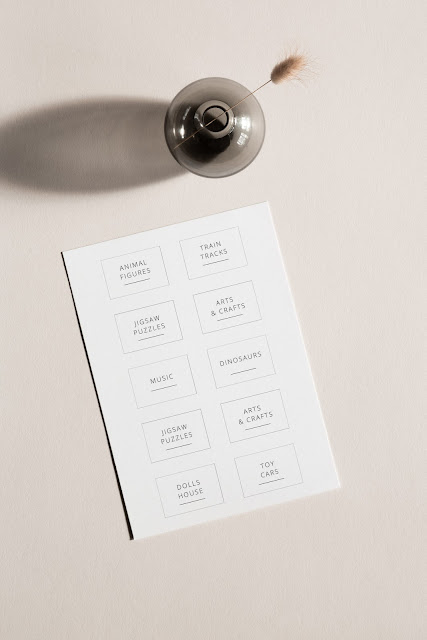
Today's freebie is a set of toy rotation labels in a simple, minimal 
style. It is a Canva template so you can edit them to suit you, then download and print at home. You can click the links below and they will open in Canva (you can login with your account if you already have one or you can create one for free).

The labels are 6x4cm each and there are 10 per page, and 3 pages of labels in total. You can duplicate the pages to create as many labels as you need. No software is needed and all of the designs and fonts are included in the template. 

You could print onto a large sticker sheet (one big label like this one:  www.avery.com/blank/labels/94268) and cut out afterwards. Alternatively you could print them onto card and use them like that, or laminate them afterwards.

Use these to stick onto baskets and boxes to organise your toy rotation and toy storage. You could also use these to organise arts + crafts materials, homeschooling supplies and anything else you would like to label!

CANVA TEMPLATE - US Letter (8.5 x 11 inches)

CANVA TEMPLATE - A4 size (21 x 29.7 cm)


Read More

Tips for parents who are new to Montessori

Friday, November 11, 2022

No comments


Today I am sharing some tips for parents or caregivers who are new to the Montessori philosophy...


The Montessori Baby and The Montessori Toddler are great introductions! I would also recommend reading some books both by Maria Montessori and also on the philosophy itself, or listening to books in Audio format (then you can be doing something else like going for a walk, at the same time - this is ideal for parents who may not have time or energy to read a book in the evenings!). 

There are also some great podcasts covering many aspects of Montessori and they are so nice and easy to listen to, and often approach Montessori from a practical and real life viewpoint. As well as this there are some lovely Montessori families on Youtube and Instagram, where again it’s so good to see Montessori ‘in real life’ in video form.


I think that an introduction to the main philosophy at the beginning is important (as mentioned before, this 3 minute Youtube video is one of my favourite simple summaries) and then building up your knowledge. I wish I had read more about Montessori before my son was born, but also at the same time, a lot of things only made more sense to me once he had arrived and once I was able to put everything into practice. 


So continuing my learning as he grows has been so important for me.
Finding a way to learn about it that works best for you; whether that is reading books, listening to them on audio, listening to podcasts, reading Montessori blogs, or watching Youtube videos (or a mix of all of these). Also finding a community of other like-minded Montessorians has been so crucial for me; through Montessori Parenting Facebook groups, meeting people ‘in real life’ and also connecting through social Instagram which is full of ideas.


My biggest tip here is to be kind to yourself! You can make small changes each week and see how they work with your child and family.

I find that I am learning new things alongside my son most days, even things that I have read or listened to before - they tend to resonate on a whole different level each time I read them again because he is that little bit older and has developed new interests and skills.

One other thing I wanted to mention - that has really made a difference for us is to intentionally use positive language (not something that comes naturally to be at all times!). Knowing that he is absorbing everything that we are saying, I have put a lot of effort into the way I say things, For example ‘don’t forget your apron, or your clothes will get dirty’ becomes ‘lets keep your clothes clean with your apron’ or ‘don’t bring your bike into the house’ becomes ‘Ah, your bike lives here in the garden!’ Focusing on what to do, rather than what not to do, has taken a while to get used to but it’s really worth it, developing a more positive outlook on life and the world around us for both my son and myself.  I think so much of Montessori is about the mindset and you can learn lots as you go. Accepting that it is and always will be an ongoing process and not putting any pressure on yourself - enjoying it as much as possible.  

My blog features affiliate links and as an Amazon Associate I earn from qualifying purchases. 


Read More

Recipe - Banana + date flapjacks

Thursday, November 10, 2022

No comments


Today I am sharing one of our family's favourite healthier flapjack recipes. It is adapted from the Clean Eating with Kids blog

It is such a simple recipe and my son enjoys mixing all of the ingredients together and scooping the mixture into the baking tin.

You can find the recipe below and also here is a PDF version of the recipe in case you prefer to print it out and add it to your recipe binder!

INGREDIENTS

  • 3 Cups Oats
  • 76g Butter
  • 6 dates (stone removed)
  • 1 Mashed Banana
  • 1 tbsp Maple Syrup
  • Sprinkle of cinnamon
  • Sprinkle of vanilla powder

METHOD

  • Make your date paste. Take your dates and cover with boiling water. Blend your paste until it’s smooth (we use nutribullet). Add a little more boiling water if needed, you want the paste to be really thick.
  • Once paste is blended, add your banana (we add it to nutribullet) and blend the mixture together. Put to one side.
  • Melt butter a little. Add the warm butter, maple syrup, cinnamon and vanilla to the oats and mix with a spoon
  • Line your baking pan with paper. Rub a little butter on the paper to stop the Flapjack sticking (we use a silicone cake tin instead). Push your mixture well into the pan, so it’s compact and even on top.
  • Bake for around 190 (depending on your oven) for 18 minutes. The flapjacks will be soft when you take them out of the oven, they’ll harden up as they cool (they seem to be much easier to cut up the next day, if you can can wait that long!)


Read More

Independent Breakfast Ideas

Wednesday, November 9, 2022

No comments


 Today I am sharing a few breakfast and serving ideas that my son has been enjoying lately, and how I set them up to help his independence. I was getting all of the items out of the kitchen cupboards regularly and then realised that I can set some things up for him to serve himself! 

My son starts his day with a savoury breakfast and also often then has a small portion of cereal, or his current favourite - a granola bowl. He eats this at the family dining table, on his Trip Trapp highchair. Here is how I set it up for him:

Cereal tray:

- small bamboo tray
- glass jar of homemade granola 
- small bamboo serving spoon
- small ceramic jug for oat / cashew milk (here and here)
- small glass bowl
- drinking glass (we use shot glasses)

                                                                    Granola bowl:

Sometimes I decant each filling into a little bowl (especially if several people are making this) or other times he will get each ingredient straight out of the container it came in. We love our mini bowls and use them in the kitchen every day. Here are the ingredients for the granola bowl that I set out:

- Chia jam (frozen berries, defrosted, blended with chia seeds)
- Coconut yoghurt (our favourite)
- Cinnamon (in our spice shaker, similar here)
- Almond butter


My son happily helps himself to each one to make his cereal bowl or granola bowl and then carries the tray of finished bowls into the kitchen, and loads them into the dishwasher. This last bit we have been working on together recently and it happens almost every time now.

Below are a few photos from his cereal setup when he was a little younger. He ate at his wearning table (Ikea LATT table with the legs sawn to be a little shorter).

The box (with a small cereal portion) was smaller and easier to open, and the jug was a tiny milk jug (that I found secondhand) - perfect for his size then. 


Back to our current breakfast time - when my son starts with his savoury breakfast every day (or is helping with meal prep) here are some other ways he participates in the kitchen (he now has the BEKVAM step stool, after he finished using his learning tower):

- Peeling vegetables
- Cutting up vegetables (using these knives)
- Whisking eggs
- Transferring bulk cooked foods into freezer portions
- Weighing ingredients (using our electric scale)
- Measuring ingredients in our cups and spoon measurers, and adding them in
- Measuring out liquids in a jug (I place an elastic band on the line it needs to be, if the numbers aren't too clear)
- Grating cheese
- Adding herbs and spices
- Sprinkling toppings onto cooking
- Loading the dishwasher


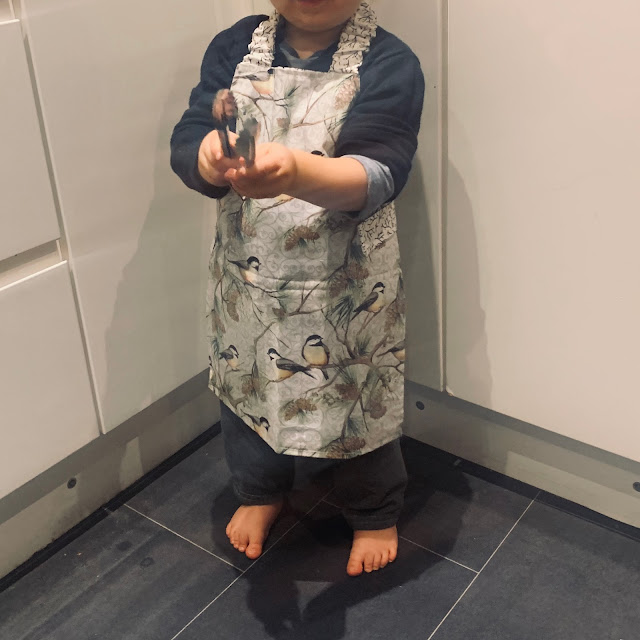
He likes to wear our favourite Marula Tree apron whilst cooking (we have two!) which is made by hand and I love that it has an easy to fasten belt, so the child can do that independently.





Read More

Free Printable: Autumn Leaf Hedgehog

Monday, November 7, 2022

No comments


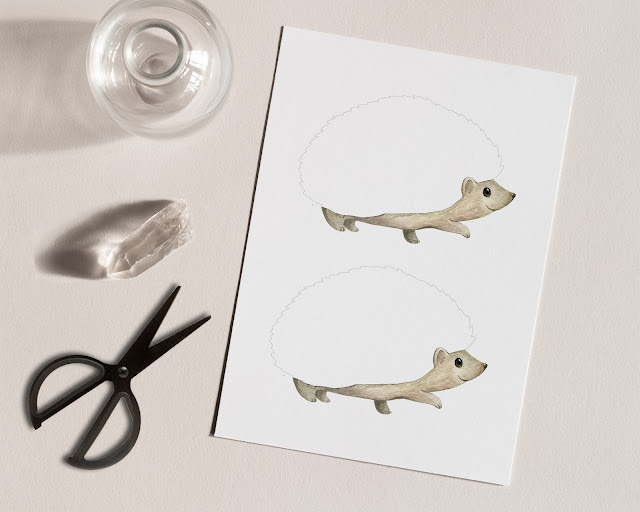
Today's free printable is an autumn leaf hedgehog illustration. You can print it out (there 2 per page), cut out the hedgehog and stick down autumn leaves as its spikes!

We used double sided tape for ours but you could also use glue - here is a non-toxic glue that is natural, biodegradable and made from potato starch.


DOWNLOAD - US Letter (8.5 x 11 inches)

DOWNLOAD - A4 size (21 x 29.7 cm)


Read More